Archives

All posts by mcoryea14

This is my final project for IMGD300X. I got to choose the concept, design the project, and had to assemble it myself.  You can see my concept explained in my blog post here: http://www.joshuarosenstock.com/teaching/IMGD3200_B13/final-project-idea-madalyn-coryea/

Here’s a basic overview of what I did.  I always enjoyed building card towers as a kid, and I thought it was cool how you could be creative and build the card tower in any way you wanted. The structure would always look different, even though you were building with cards.  So I decided to go with this concept for my final project.  I created a board using graphite (pencil), alligator clips, posterboard & cardboard, and the Makey Makey that would allow the user to build “card towers”.

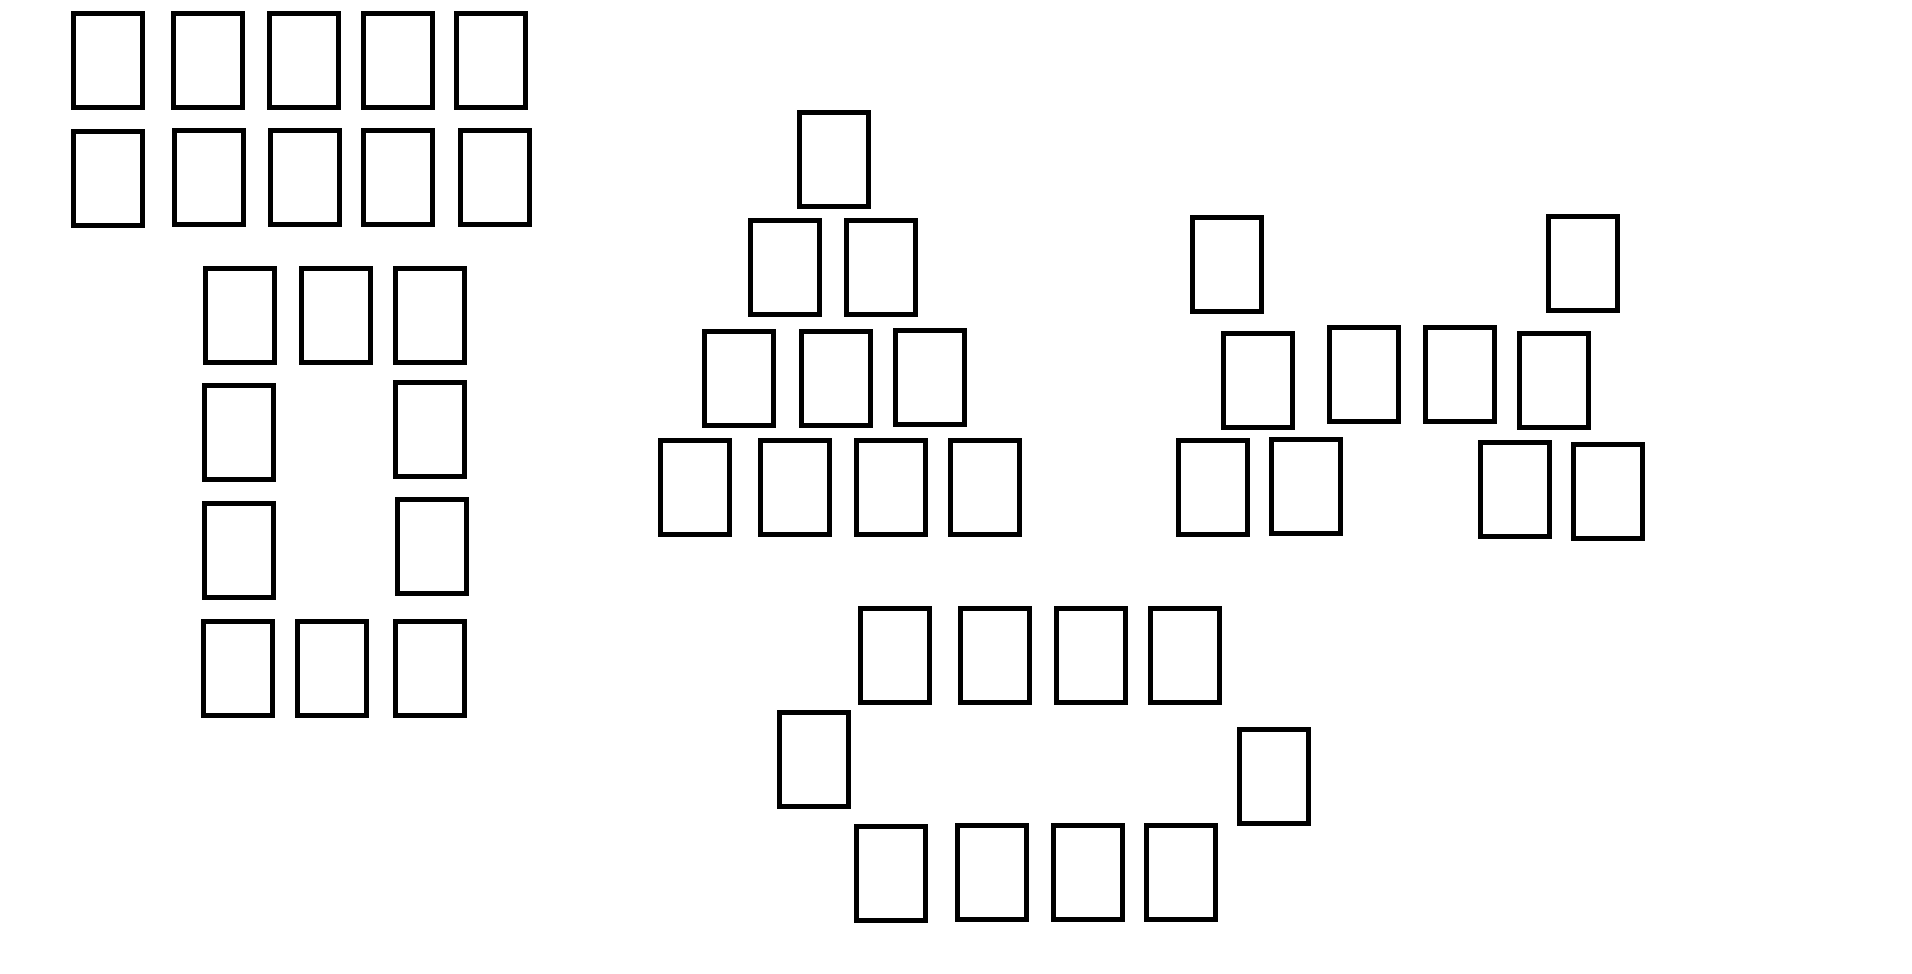
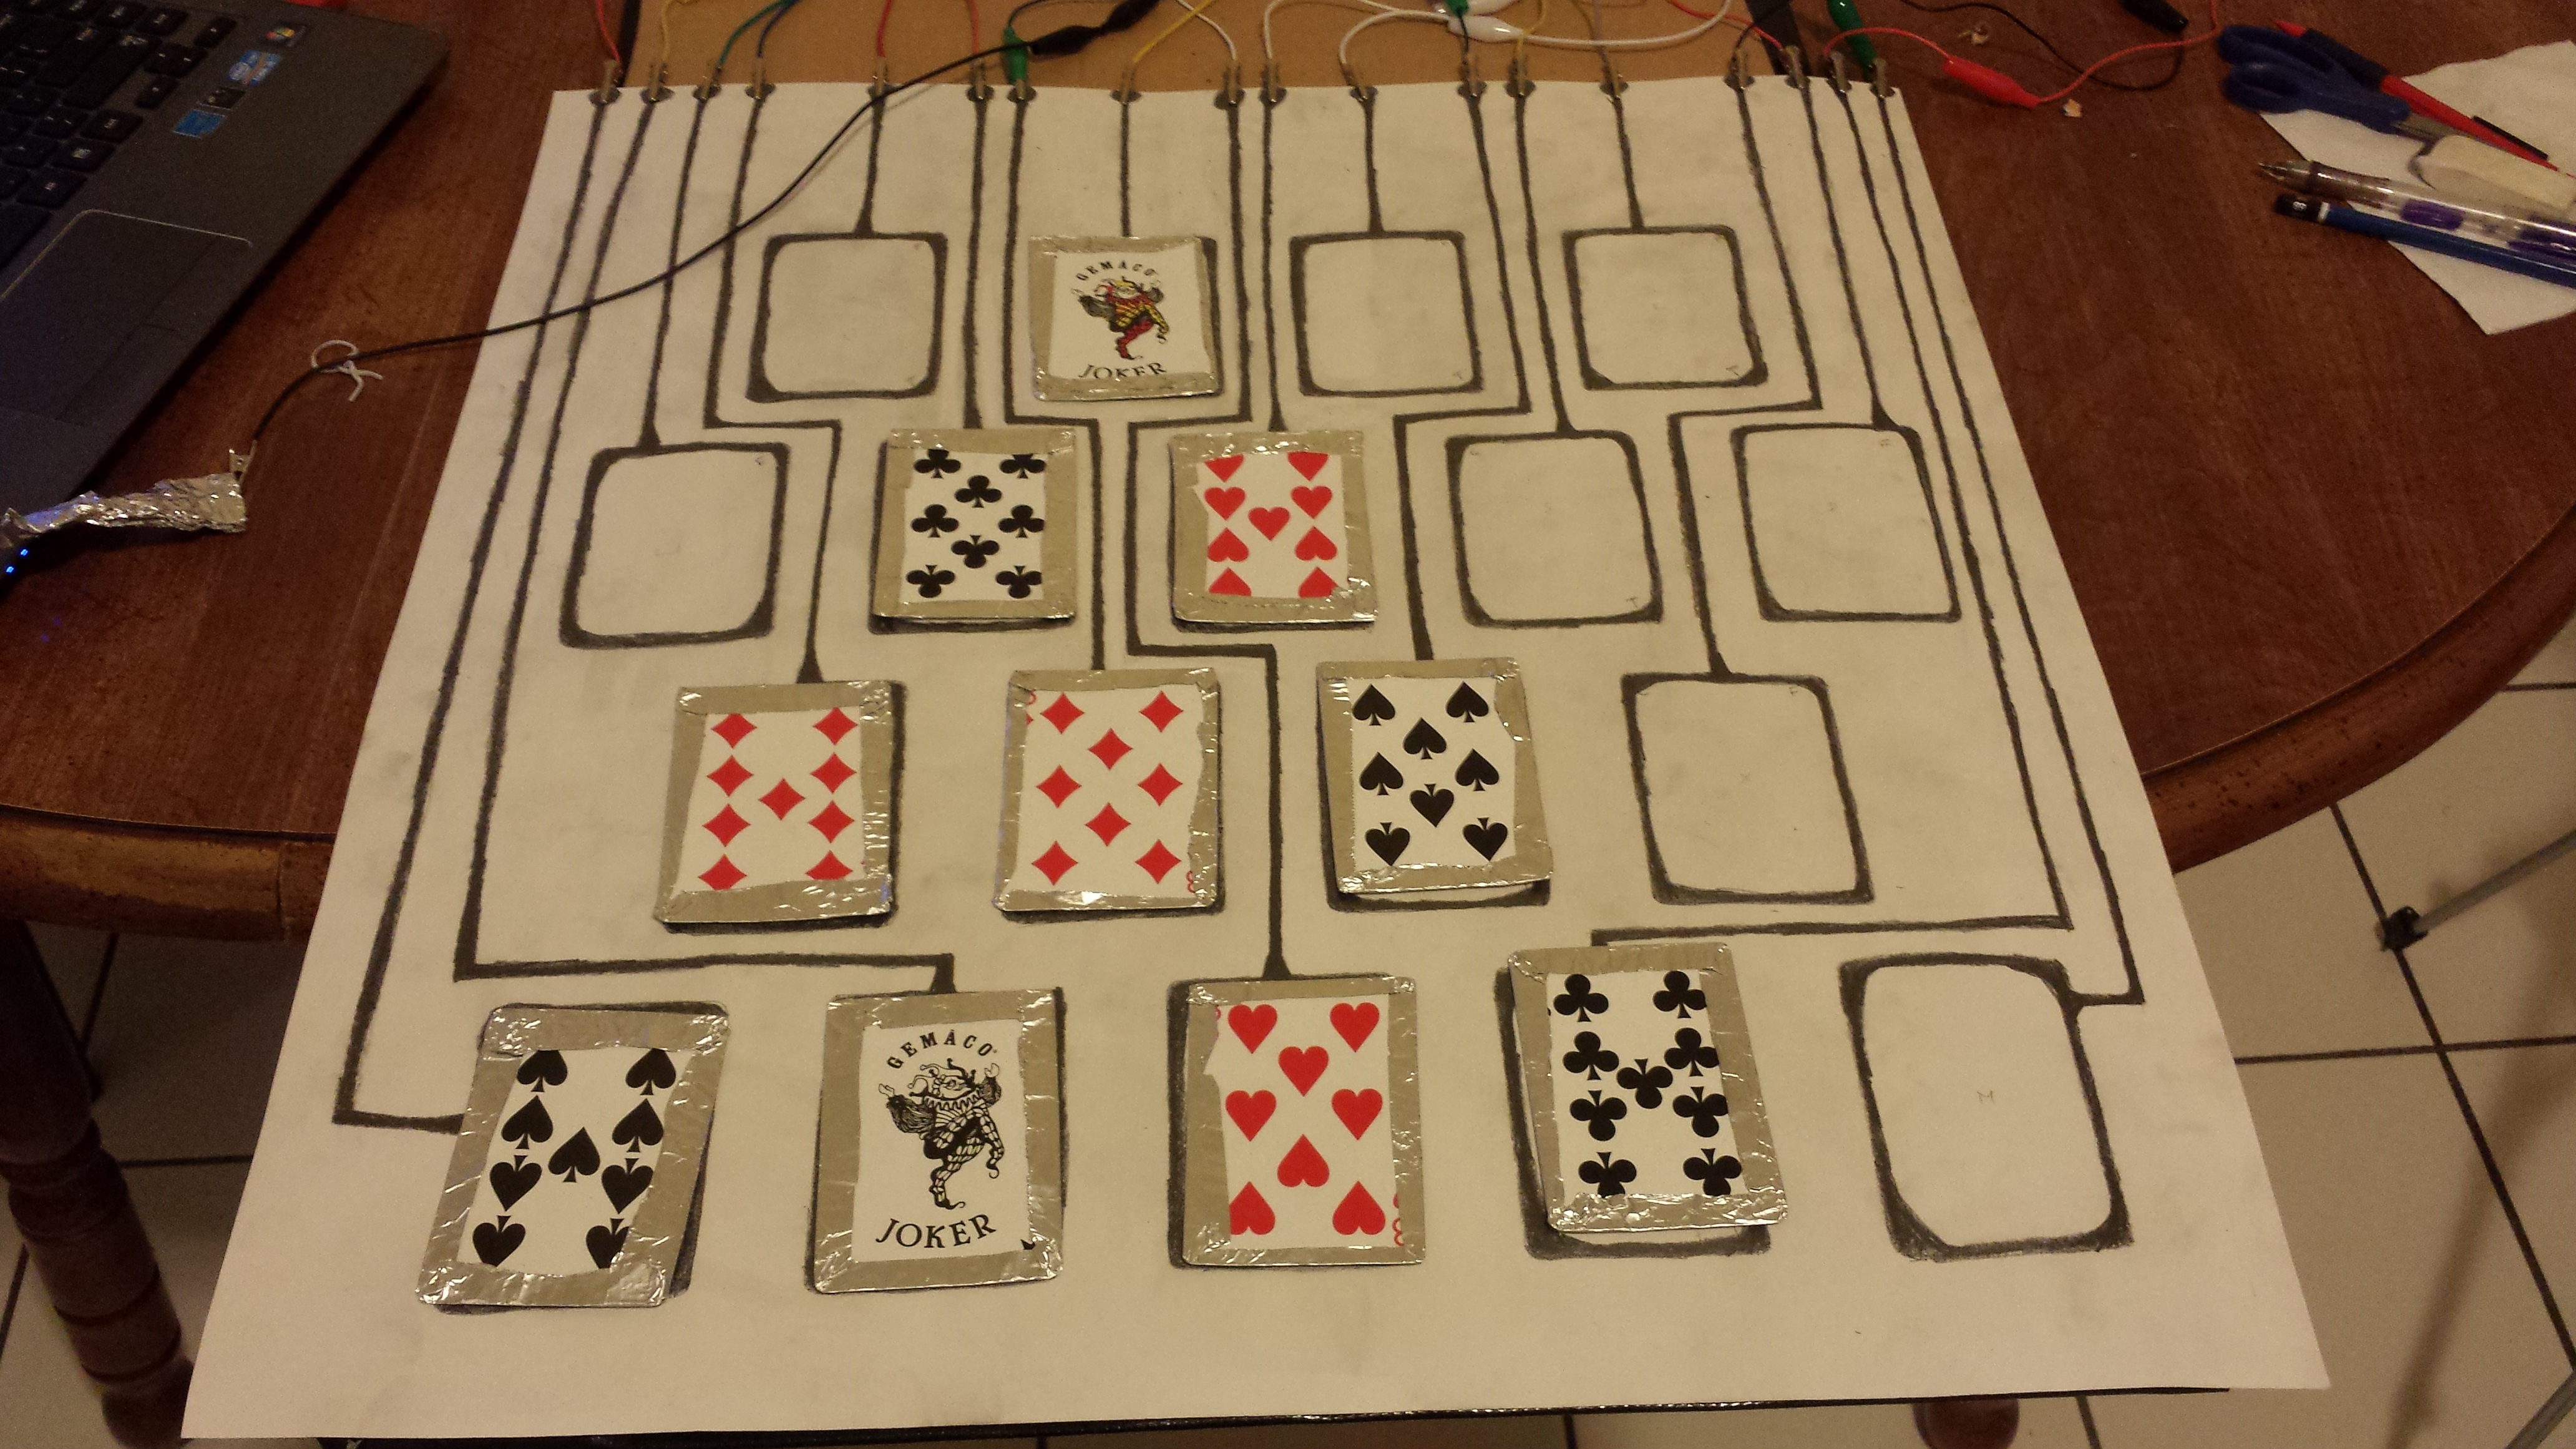
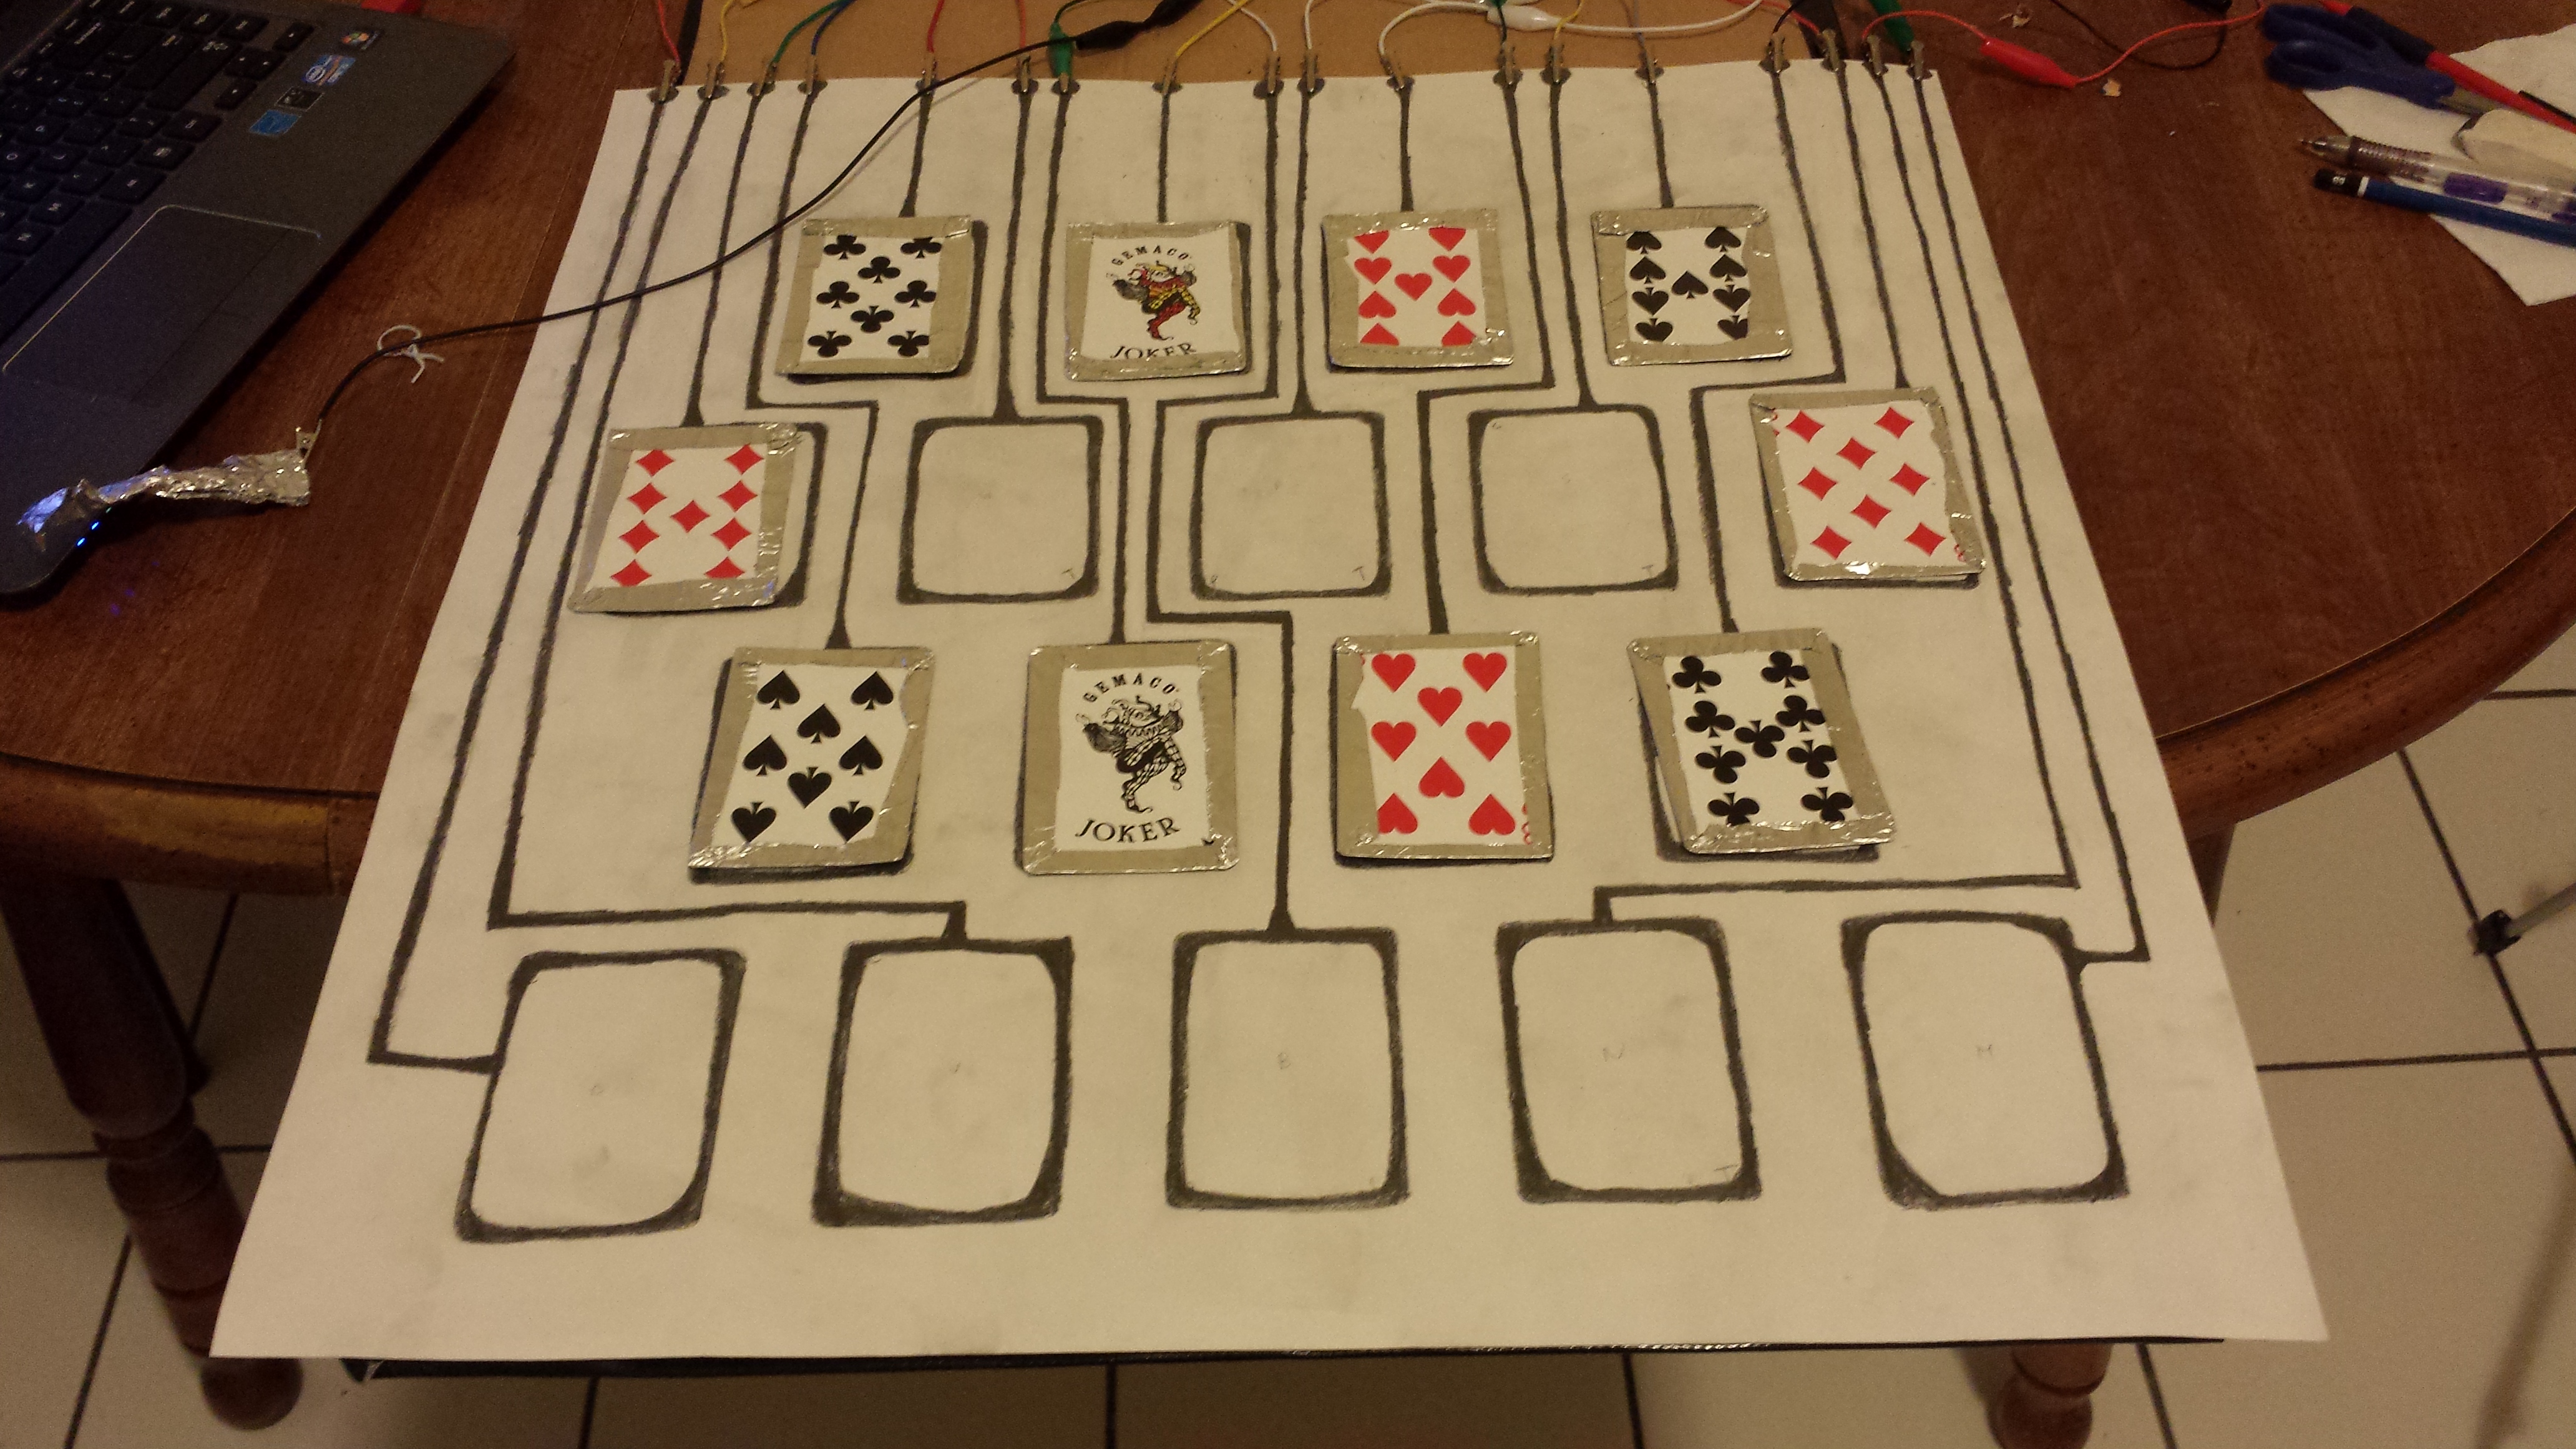
My concept was that the user could use real playing cards to form different patterns on this board I created.  Then the patterns would “come to life” on the screen through PureData.  I wrapped the backs of 10 cards in aluminum foil.  With these 10 cards, one could create one of four patterns on the board: a pyramid, a fortress, a castle, or a tornado. (Below are pictures of each of the 4 formations on the board)

pyramidfortresscastletornado

See the video of this all working below: (You can see the cards appearing in “blue” on the screen as they are being put down. This means the key was registered and the input was stored.)

http://www.youtube.com/watch?v=iFweRXP06PA&feature=youtu.be


I have my boyfriend helping me out in the video. By him holding the ground, and me holding his hand, we make a circuit for the system to work.

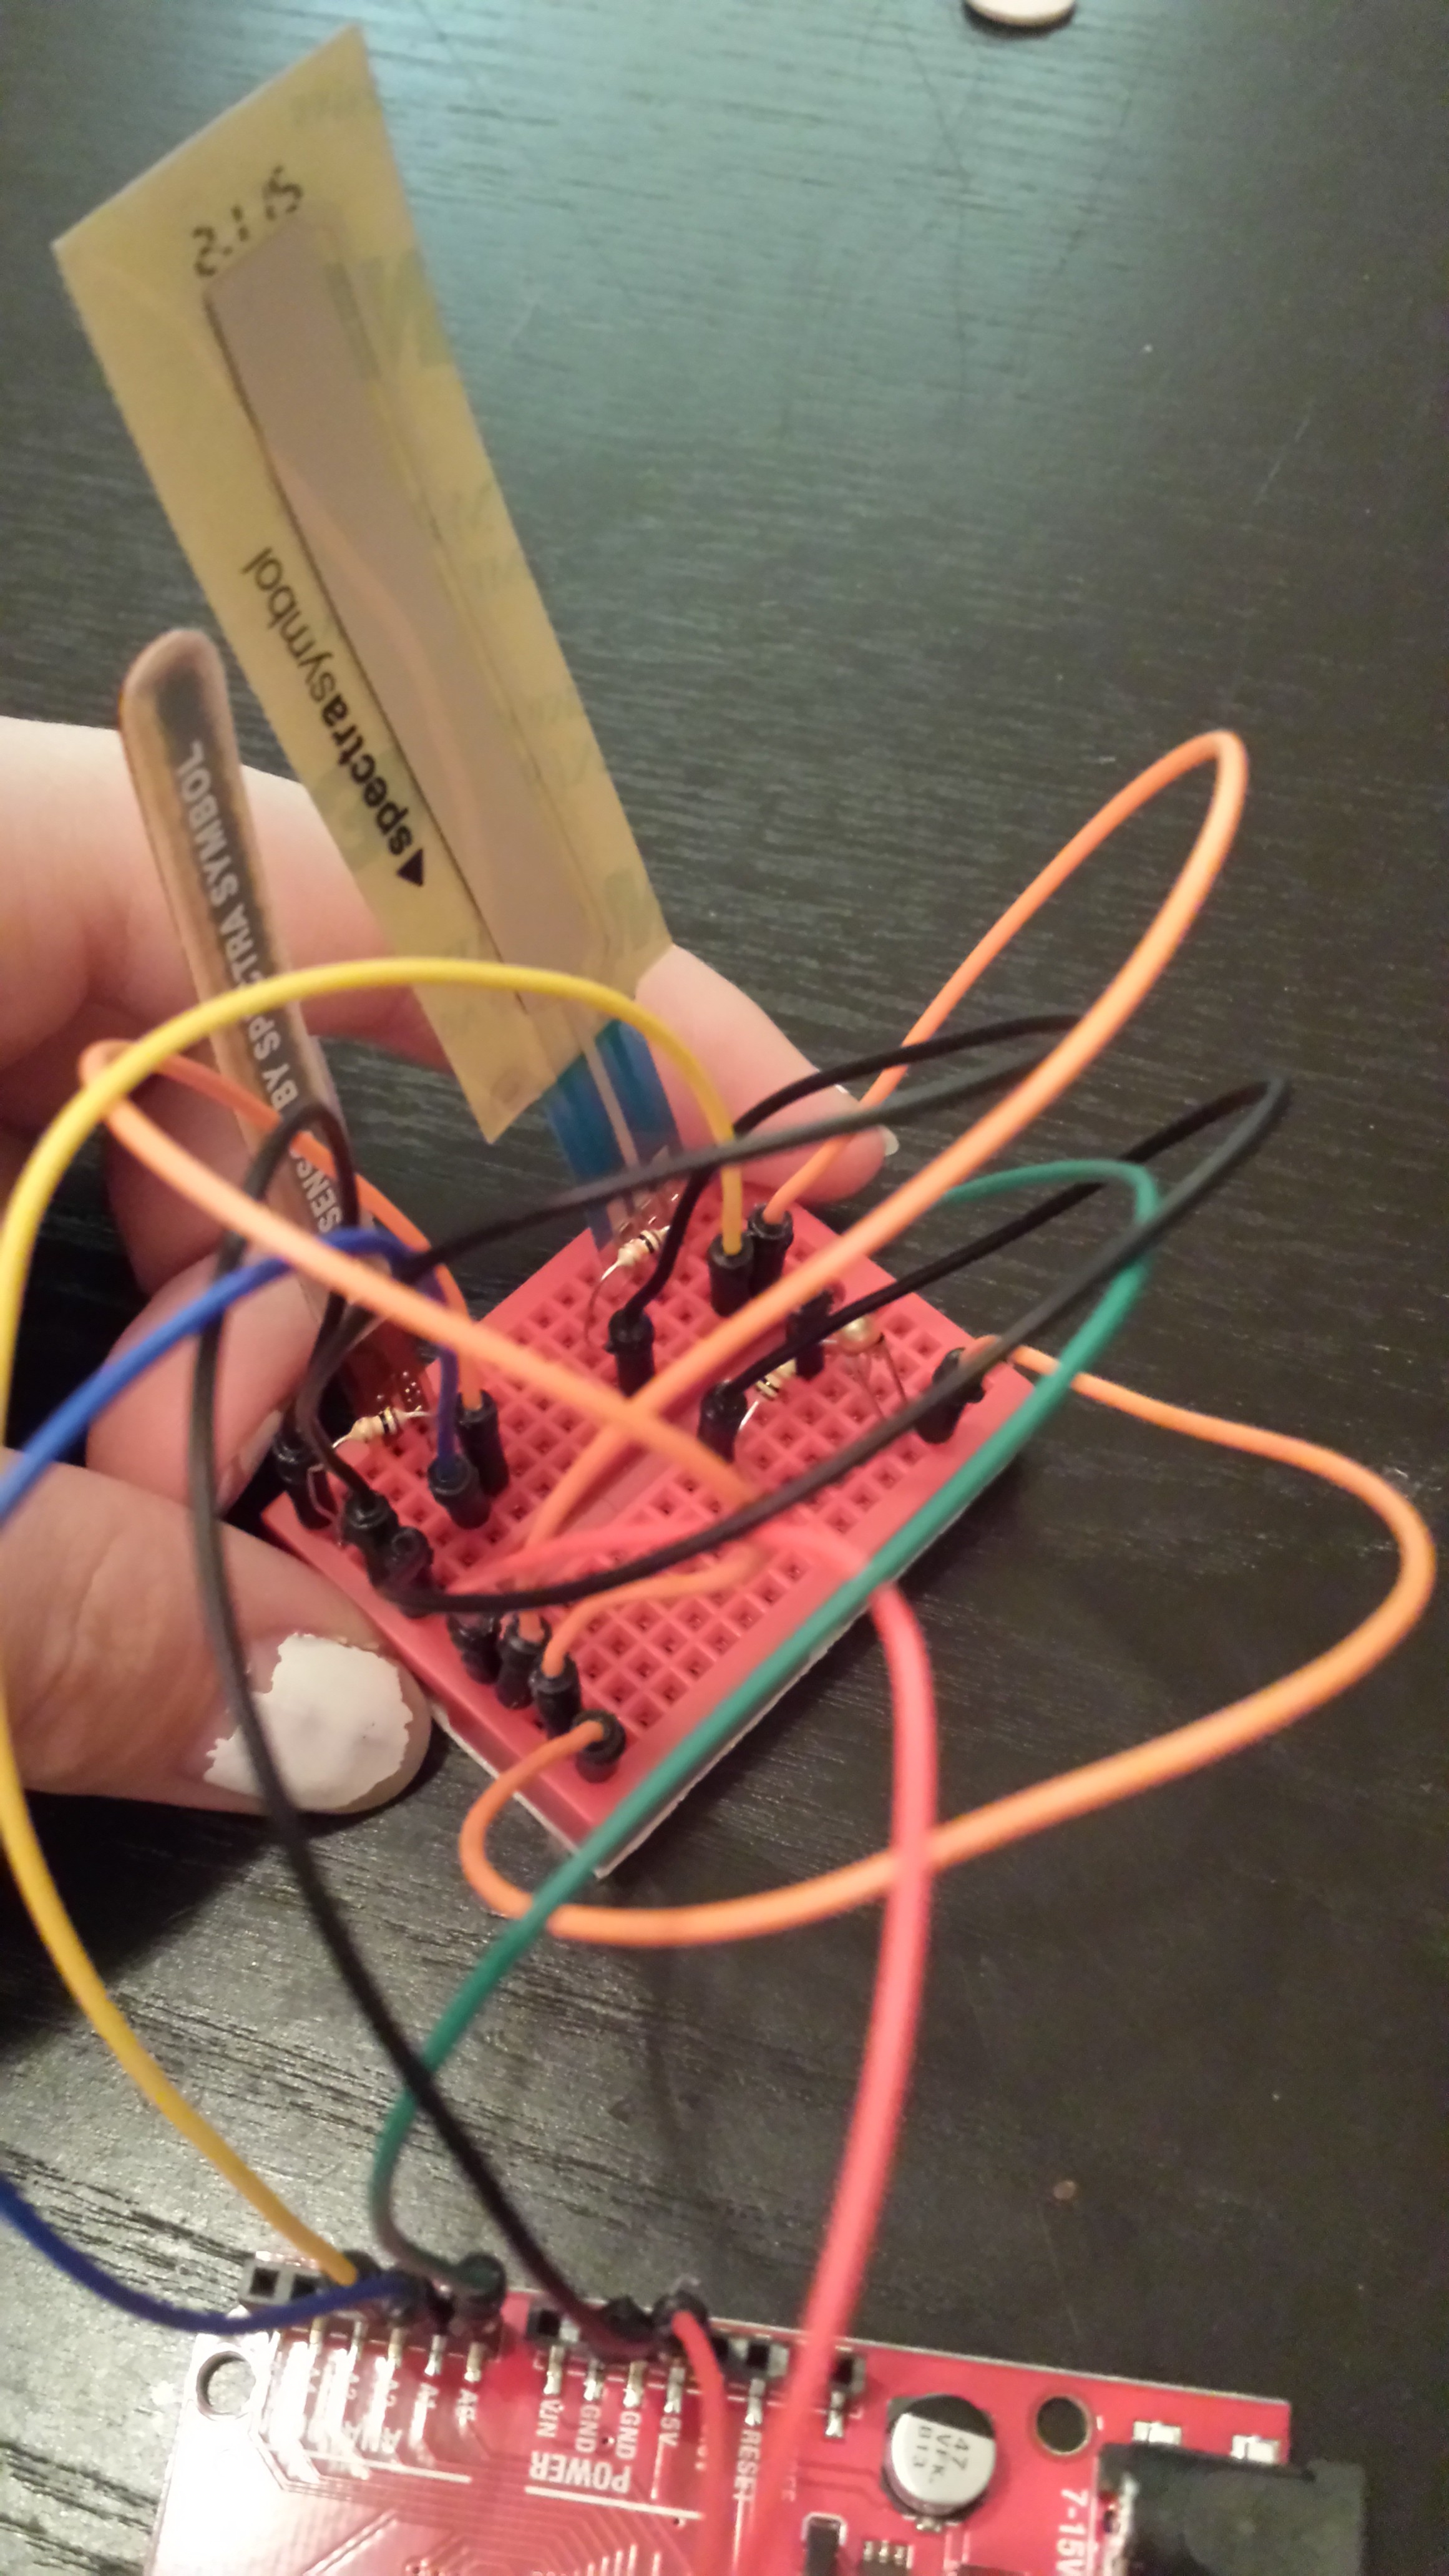
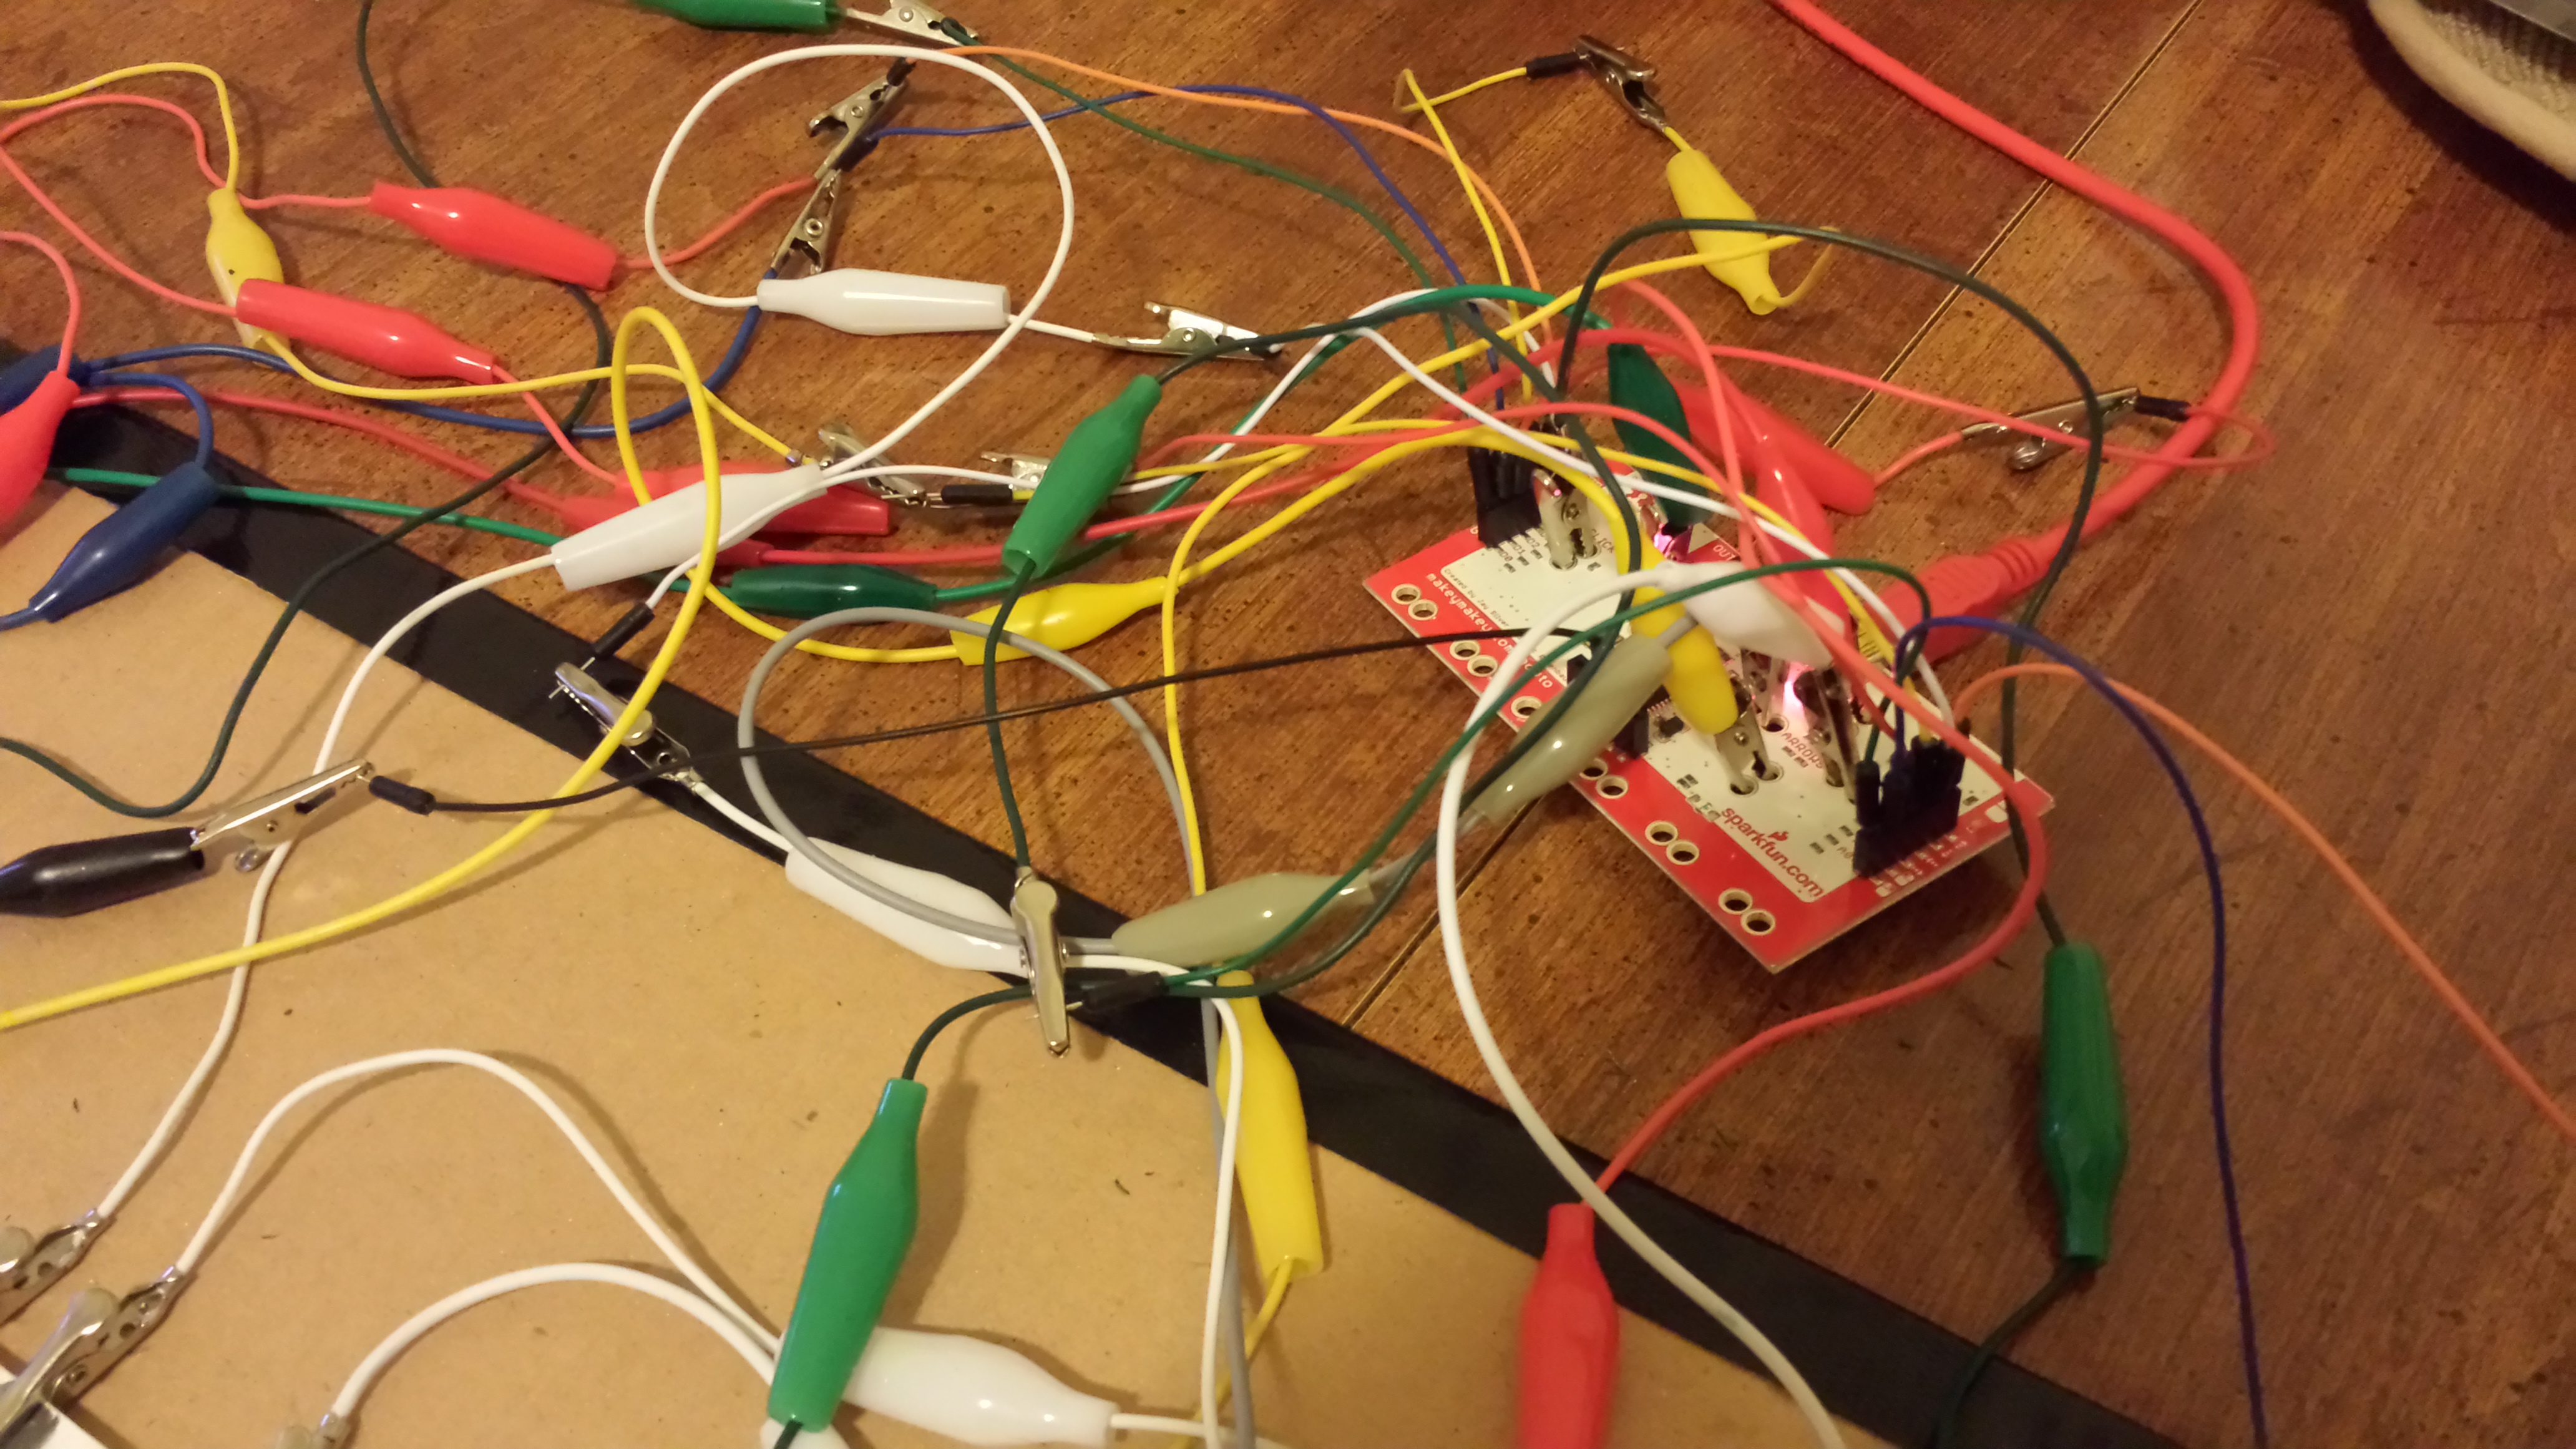
Here is a picture of my Makey Makey set-up with all 18 alligator clips connect to the 18 different ports. The black alligator clip is the ground. The clips are connected straight from the Makey Makey to the posterboard that has the card-outlines drawn in graphite.

makey makey


Here are the 10 cards I used. Each has the back of it wrapped in aluminum foil so that they are conductive as part of the circuit.

aluminum cards

This works because each of the 18 spaces on the board is hooked up to a different “key on the keyboard” through the Makey Makey. One of the obstacles I faced with this project was getting all 18 inputs to work with the Makey Makey.  This is because not every input on the Makey Makey is associated with a key on the keyboard. Out of all 18, 11 inputs deal with keyboard keys and 7 inputs deal with mouse data.  So instead of pressing “a” or another key, when you hook something up to one of the other 7 inputs you’ll get a “mouse click” or something else to do with the mouse.  This data was tricky to read, so I thought it best just to reprogram the Makey Makey to read keys for these inputs instead.  I did this by changing some of the Makey Makey’s code in the Arduino Environment (the Arduino IDE) through the course of following some very helpful tutorials.

If you try reprogramming the Makey Makey for yourself, here is the link to the tutorial I used: https://www.sparkfun.com/tutorials/388

I had some trouble getting my computer & Arduino IDE to recognize the Makey Makey correctly, but after that was done, it was really quite easy. I will break down the steps for you:
1.) Plug the Makey Makey into your computer

2.) Download the Ardiuno IDE (if you haven’t already).

3.) Figure out where the files for the Arduino IDE are stored on your computer

4.) Then, you are going to download the Makey Makey addon and put it where they tell you

5.) Now this was the hard part for me. Follow the bottom half of this tutorial for getting your computer to identify Makey Makey correctly: https://www.sparkfun.com/tutorials/378. You’re going to want to download the real driver that they give you a link to, otherwise your computer (Windows) will just read the Makey Makey as “USB Input” or something like that. Give your computer the folder where the driver is like they show you in the tutorial, click “yes” to the scary message, and presto, you’ve got your computer identifying the Makey Makey. (My computer freaked out here, and I had to redo some of this process but hopefully it works better for you).

6.) Now open the Arduino IDE. Select the port (COM4 or something like that). Now select the device. If yours says Makey Makey, great! Select that. No matter what I did, I couldn’t get the Makey Makey device to appear in this list, but I just selected “Arduino Leonardo” here and it worked fine.

7.) Back to the first tutorial. They give you the code in a zip file that tells the Makey Makey which key is which. Download this.

8.) Once you’ve downloaded & unzipped the code, open it in the Arduino IDE (by double-clicking it or whatever. however you normally open things)

9.) Make sure you can see/access the settings.h file. This is what you change.  (They have this file commented nicely. It’s pretty clear what keys go with which points. So just change whatever you want).

10.) When you’re done changing inputs, Verify & Upload the file to your board, just like you would any other Arduino program. (The Makey Makey should blink a bit, but when the load bar completes, try it out! The keys should be different now; whatever you changed them to.)

I hope you enjoyed my project. It was fun to make, even if it took awhile.  I did have to run out and buy more alligator clips than the Makey Makey provided (19 in total! –one for each input + the ground). My idea for expanding this is to have MANY more combinations of exactly 10 cards on the 18-card sized grid to make different patterns. I would also like to have the actual cards appear on the computer somehow as you place them. There is so much that could be done with this concept. However, if you ever play with it, it is really fun, and I enjoyed building cards with it very much.

For my final project in IMGD300X, I came up with the idea of making a metaphor with “card towers”.

It is a lot of fun to build card towers, so I came up with a board that lets you build card towers that turn into actual things through PureData.  I will be using real playing card to build a “card tower” on the screen through PureData.  With the board that has a set number of card spaces, you will have 10 cards to arrange in any order you choose on the board.  There are set patterns that will create a diagram and then an animation on screen.  Create one of these special patterns and you will get an animation of the diagram/shape you created. If you create a pattern that is not one of these, there is a default animation you will get.

The board is set up with alternating rows of 4 or 5 card spaces. There are four rows total. Each space is hooked up to a different key on the Makey Makey. The cards in the alternating rows are slight displaced from one another so that there is a shift in the spacing between cards of different rows. This allows for a large amount of design patterns.

An example of how the board is set up is below:

[] [] [] [] []

[] [] [] []

[] [] [] [] []

[] [] [] []


So I am going to use the MakeyMakey to hook up the different playing cards to the computer. Each card will have aluminum foil on it’s back so it can complete a circuit with the board where the cards are placed.  Each card space will be traced out in graphite pencil and then the graphite trail for each space will be hooked to the MakeyMakey with an alligator clip.

I also really want it to be able to tell which cards are put down, so that once a card is placed, it is put in the correct place on the screen (which will display the real-life board with all the available position). This may or may not be possible at all.

Mainly, for research I need to make sure this is possible in PureData. I already know that I can put pieces of aluminum foil on the cards to make them conductive for the MakeyMakey. And I know that I can display an image on the screen when a key is pressed on the keyboard. What I need to find out, is if I can determine the order in which the cards will be displayed on the diagram I am going to form. I think with some logic it should all be possible. I just really want to make sure that I can detect the when all the correct keys are pressed to play the correct animation. Switching out the screens may be difficult. I also don’t know if I can display the correct cards on screen for each space. If this is not possible, I could just display a blank card on the screen. Or as a last resort, I could display nothing on the screen except for the animations.

This image shows a (rough) mock of some of the diagrams (with respective animations or pictures) that I am going to form.

card_layouts_imgd


They are: a pyramid, a castle, a fortress, and a tornado (not shown). The default will be a collapsed pile of cards. I am going to try to make as many cool diagrams as I can that are metaphors, and integrate them into the system.

For IMGD this week we had to play with the arduino. Now the really cool thing about the arduino, is that it comes with all different types of sensors that you can hook up and play with to get different readings of data.

For this brief project, we had to use 3 sensors:

1. The flex sensor: measures how “bent” the sensor is

2. The soft potentiometer (Spectra): tracks/senses where a finger’s position is on the sensor strip

3. The temperature sensor: measures temperature changes


My idea was to have these 3 sensors control the RGB values of a circle that I had made in PureData. With three different values coming from the data being picked up by the sensors, the user can adjust the coloring in a lot of cool and unique ways that comes directly from the user’s input.


In this image you can see my set up with the arduino and breadboard full of the 3 sensors and many connectors.

attachment (10)


In this image, you get a closer look at the configuration of the different 3 sensors on the breadboard.

attachment (9)


My video below explains exactly what I did and shows my arduino set-up with my sensors. So please watch the video for this explained even more!


For this project we had to make an interactive “remix” of popular internet memes. Some of my favorite youtube memes are from the youtube channel Schmoyoho. They have a segment of videos that are widely popular where they “songify” stories on the news or other popular youtube memes.

By turning already hilarious videos into songs, they create catchy works of art, and those videos themselves become famous memes. One of their most famous memes is the “Bed Intruder Song”; both the original news story and the version that they auto-tuned into a song are famous, but the Bed Intruder Song alone has over 118,000,00 views, surpassing the original. So you can run and tell that homeboy.

So I picked Schmoyoho’s memes as my material for this assignment. But I wanted to give it a twist: I also decided to do some subliminal messaging in my piece. I focused specifically on fast food.  I sampled from the Schmoyoho memes that had a mention or reference to fast food. My first video meme was the Charles Ramsey “Dead Giveaway” song. Charles Ramsey makes several references to “McDonnalds”, and the way he says it is very comical. But Ramsey is also considered a hero from helping to rescue the 3 women locked in a basement in Ohio. So by Ramsey telling you that he was “Eatin’ my McDonnalds”, he is representing a positive connotation to a hero + fast food. My second video meme was the Dayum Drops songified “Oh my Dayum”. The youtuber Dayum Drops already has a large youtube following based on his ridiculous and over-the-top food reviews. His review of 5 Guys burgers got his review auto-tuned into the song “Oh my Dayum”. It’s another catchy Schmoyoho song, and watching Dayum Drops open that burger wrapper can really make you crave 5  Guys.

So once I had my videos picked out, I decided that I wanted to contrast the Schmoyoho videos by putting them next to the originals. Then I trimmed the clips I wanted in Corel Video Editor to different bits where either Charles Ramsey or Dayum Drops was referencing fast food. I used a text object to display a flashing message at the top stating “Eat fast food – now”. I then trimmed a sound loop and had it play in the background to tie everything together.

I used the patch to connect a controller as input so that you could scratch the videos and enjoy watching Dayum Drops unwrap that 5 Guys burger again and again and again.


[watch the video below]


I connected a ps3 controller to my computer (to use as the controller) via a USB charging cable. I had to use MotioninJoy to properly detect the ps3 controller to serve as input. Interestingly enough, with MotioninJoy I could tell the computer to use the ps3 controller as an X-Box 360 controller. This worked so that the inputs were detected to be the same as the patch we had done in class; which had been set up for an X-Box 360 controller.

In PureData I used “send” and “receive” objects to direct inputs from the ps3 controller to the patch that controlled the video memes. In the video meme patch, I had to strip the audio from the videos, and load it in separately for each video. I had to use .wav files for the audio and .avi files for the video. Avi files were the only things that worked at all for video! I spent so much time figuring that out. Even .mp4 and .mov files wouldn’t play in PureData for me.

But it all came together (magically and after much PureData struggling). My piece represents the influence of fast food in our culture through the medium of internet video memes.

I was very intrigued by the guest artist Deborah Aschheim who came to class on Thursday.

I remembered her from a couple of years ago when she had come to WPI to commission an art piece in Fuller Labs. I had never really understood what her work was exactly, so it was interesting to get the chance to talk with her and have her tell us her perspective.  The piece was inspired from Deborah’s fascination with memories.

In class, she explained to us about her interest in Cognitive Psychology, and how humans have the ability to create memories from nothing, and that memory is still something that we don’t fully understand.  She told us about this “artificial” memory she had had from a photograph of her from when she was little. By remembering the photograph, she made up a memory from when she was IN the photograph—when in fact, she was too young at the time to have remembered it at all.

Deborah beginning her art piece on the stairs of Fuller Labs

That is when Deborah got the idea to make these sculptures, one of which is the same sculpture in Fuller Labs.  The piece is composed of different segments, and each main segment has a little display that is playing some sort of video.  Some of the parts of the sculpture were connected to video-feeds, as if the walls in Fuller Labs could see and make memories.  Other video clips were taken from various places throughout the building, and played on the screens.  Some of these videos were direct screen capture that was recorded from a PC in Fuller that someone had been using.  Others were scenes from a classroom.  The piece gives you many different flavors of what the building that is “Fuller Labs” has to offer.

Just so you can really understand, I’ve included a close-up photo below of how Deborah’s little video “hubs” looked. You can see some of the different video clips that these devices were constantly playing.

A section of the piece in Fuller. Each “hub” has a mini screen inside that each play a different video clip. These are supposed to be “living memories”.


One of the main things I found so interesting about Deborah, is that right away she told us she had a “Nixon obsession”. I wasn’t sure exactly what this meant at first, but she explained that she had grown up in the era of President Richard Nixon. And when she was young, the political turmoil of that time had had quite an effect on her.  She was fascinated by the Watergate Scandal, the violent acts against the Ohio students at Kent State, and the event of the only president in American history to ever resign.  Deborah shared with us how she would constantly draw scenes from old photographs from these times, as if tracing the images would somehow allow her to eventually make sense of this.

I truly loved this about Deborah. You can get a feel for her innate sense of curiosity; which is crucial in an artist.  I could relate to her looking at public figures and wanting to understand who they really are. What do they think like?  What was crossing Nixon’s mind when he had to announce his resignation? It’s easy to forget how those who are famous are still people, and honestly, are not all that different from us. Wanting to understand them on a personal level, where you could justify their thoughts and actions, is an interesting, complex, and yet understandable vendetta.

On Deborah’s website she has a section on “Involuntary Memories”, which are about her Nixon fascination. I enjoyed going through these and reading through the different stories and images, so I’ve attached a link to it here.

http://www.deborahaschheim.com/collections/view/346

So this week in Inter-Media Electronic Arts we got to play with the MaKey MaKey. At first, I was worried that the MaKey MaKey would be similar to the Arduino,  which required an understanding of circuits and some general ECE concepts (scary!), but it was actually wonderful to work with.  The way the MaKey MaKey works, is that it is simply an additional “keyboard” and inputs to the Makey Makey are just interpreted as keystrokes on a keyboard.  Then you use conductive materials and alligator clips to make different objects act as input devices with the Makey Makey.

Here is an example from Makey Makey’s site of what type of objects you can use with the Makey Makey.

(Image from http://www.makeymakey.com/)

The artist here used alligator clips to attach bananas (which are conductive) to the MaKey MaKey. The artist then either wrote, or opened a piano-playing application on the computer.  By hooking up the bananas to whatever keys played the different notes on the piano in the applications, the user could “play the bananas” like she was “playing a piano.”  It’s actually really simple, but really neat!

So our task this week was to use the MaKey MaKey (hooked up to our own drawing) and a set of our own animations to create some art.

That was a pretty open ended assignment, so everyone created something quite different from each other.  I decided to pick up where I left off last week, by starting with my interactive animation and enhancing it.

For the project there were a few requirements. There had to be sound in our project, and we had to create a pencil drawing or “map” that would control our animations.  Starting with my interactive animation from last week, I got rid of the other two animations and stuck with the Pikachu animation. Then I enhanced the Pikachu animation by adding more parts to it. In PureData I added sound for Pikachu coming out of the Pokeball and for Pikachu summoning the thunder.  I also added a sound that played on default while the application was running.

I chose sounds for my project that were from the original Pokemon games.  I thought these were fun, fitting, and nostalgic for many WPI students.  Once I got the clips, I trimmed and edited them appropriately in Corel Video Editor until they sounded like continuous loops.  The “Pikachu” sound and the thunder crash aren’t loops, because they only play as the lightning is crashing down.

For my “map” that would control my animations, my goal was to make it artistic.  The drawing that was the controller for the MaKey MaKey was supposed to be as interesting and beautiful as the animations themselves.  I drew my animation so that it was a sequence: a closed Pokeball, a Pikachu, and an open Pokeball.  The idea is that you first open the Pokeball to let Pikachu out.  That is why it starts as closed.  Then you call on Pikachu to use Thunder.  This is why you tap Pikachu as the second step.  And last, the Pokeball is open, meaning Pikachu is still outside it.  So tapping the open Pokeball returns Pikachu to it, and the animation sequence ends where it started: with a closed Pokeball.


I made a video of all this below, and I explain a bit of what I did while I demonstrate the MaKey MaKey attached to my drawing working together with my PD patch with my animations.

It’s always interesting to learn about new software each term, especially as a Software Engineer and Computer Science Major.  I have a fascination with software, especially open source, since a software’s creator is usually a person who is similar to me.  I like to think about what the engineer was thinking when he or she added a certain feature, or organised an interface a certain way.  Would I have found the same solutions to their engineering problems?  How would I have gone about solving the puzzle that is creating new software?  I am always happy when I am introduced to a novel piece of software in a course, because it allows me to think deeply about all these types of questions.

This B Term at WPI I have been introduced to a software that is alien from any other that I had used before.  It is a tool that we are using in IMGD 300X, Inter-Media Electronic Arts.  This software is called PureData.  In PureData (or “pd”) you create applications by using visual “blocks” that you drag around the screen and connect with lines to create relations.  These complex visual webs you build up to create programs that will generate different works of art.

In pd you can add almost any form of media (audio, picture, video) and use it in some way to form a creation.  The first week of the course we used pd to create geometric shapes with the GEM library.  In pd we used different types of blocks to create triangles, squares, and circles of all different colors.  Pd allowed us to rotate and scale these shapes on screen to create interesting illusions.

Last week we were able to use pd to load-in our own images (and thus, animations) and track cursor movement and mouse clicks to create responses based on the user’s input.  If you would like to checkout the result of one of these projects, checkout my blog post on my interactive animation, on go to my youtube channel here to see a working demo:

https://www.youtube.com/watch?v=0kfljIzhphs

There will be more to come in my subsequent posts on PureData, file I/O, and animations, but for now, so long!

Madalyn

Hi All;

Here is my interactive animation:


I’m sorry that the clicking sound is so annoying. I had a difficult time getting a screen-capture software that actually worked, since my computer didn’t come with one installed.

My image has three animations. You can click:
1.) The fountain

2.) The pokeball

3.) The Campus Center building

Each will play a corresponding animation when clicked. I used photoshop to create the animations. I used PureData (pd) to put it all together and create the interactive environment. The main image I took myself over the summer (2013). I drew the animations for the fountain and the building, and the images for the pokeball and pokemon I got off DeviantArt.


I explain all this in my video. Enjoy!

~Madalyn