All posts by Ivan Melnikov

Musical LEDs: The Documentary

Unfortunately, this will not be narrated by Morgan Freeman – however, I think I am the next best thing. Anywho – big thank you goes out to the ECE department for providing me with a different bread board, the power supply, special pin cables, the TIP31 transistors and a power adapter for the board.

The project was going in the right direction all the time, however, there were many bumps along the way – mainly the power source, as well as my laptop’s and desktop’s inability to detect the board through Max 7 and Windows 8.1 (dammit, Microsoft). I had two bread boards at my disposal, as a result I built two circuits – one with one RGB LED light to test the patch and have a minimal viable product, and the second one with the full strip.

First step consisted of tearing down my LED light strip – good, since I am still going to rearrange the room after this. Second part involved me crawling on all fours to get my power supply for the board (ended up not using this one – did not work – used the one provided by the ECE department).

I built the single LED board and tested the patch – mine and the demo from myWPI. Everything worked. Then, I built the second board, replacing some of the resistors to weaker ones since the power consumption was already enough to keep the lights really dim.  I ran over to the ECE department, grabbed what I needed for the power and hooked everything up. Well that did it –  LEDs were reacting to sound. Primarily, as seen in the demonstration you had the green light favored over others due to volume and the sound filter. If you look below, you will see the final board images. After that – a video!

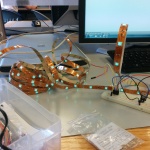
BoardLEDs

Musical LEDs

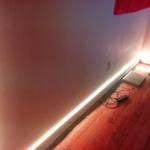
I decided to build something relating to LEDs for the final project in AR3200. The strip will be controlled using an Arduino board, which, in turn will be controller either by Max, or by my cell phone. There is a way to control the board using an Android device as a host – and I have plenty of cables for that. The image below shows my room right now. That strip will be used for the project.

2014-12-15 18.31.06

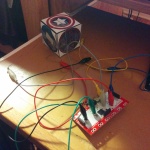
The image below is the box that I will essentially be replacing using the Arduino.

IR Receiver

The box pictured is a simple IR receiver, used by a usual 52 key remote for these lights. The Arduino board will be interfacing with the computer to respond to music. Using a similar patch for the beat boxing video remix project, the volume, highs and lows will control the colors, as well as the opacity. A preliminary mapping will have volume on opacity, lows on the reds, highs on the blues and something else on the greens. Still have to figure out how. I have found a power supply – the LED one should actually work for the board itself, I just need three TIP31 transistors from the AK department – getting those tomorrow from the ECE shop. Hopefully this will all work…

For a proof of concept, and the inspirational video:

I will not be using the Arduino IDE though for the code since Max PSW will be used for that.

Video remix/performance

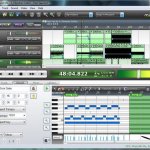
This project started out in one direction, and then just took a dive off of a cliff into another one. I first started to composite a song in Mixcraft since I have been working with that program for a couple of years now – extremely on and off. A preliminary view is below:

Mixcraft

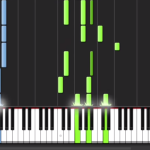
This then evolved into Synthesia, which is a kind of virtual-piano software that lets you learn to play the piano. Now, I have no idea what key to press, however, MIDI files are available for download and I have based some music in the final project:

Synthesia

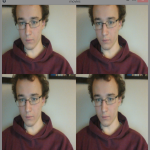
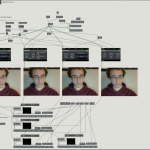
However, even if these programs greatly helped with the audio part, I wanted something different – so beatboxing! Those who know me, know that it is really difficult to get me to be quiet. This is the patch created with 3 different video perspectives of me beat boxing. The concept is rather simple actually – a high and low pass filter is used to split up the sounds. In various degrees, the effects are added to the clips.

After today’s class, I decided to add the canvas idea, hence all of the videos are now rendered in a separate window (as well as in the Max program itself). Here are some screenshots from the program below:

Movie window

Patcher window

As well microphone input (which makes it cooler than the second method), you can specify an audio file in wav format to see the effects as well.

The Avengers

Well, as stated in class, I am a big fan of Marvel’s “The Avengers”. As a result, I thought that incorporating them into my interactive project would be a pretty cool thing to do. Because of this, the project idea was born.

It all started back in class when I began drawing the icons for each of the 6 Avengers (only looking at the main ones for now). Each of these are very basic – using only the built in tools in Photoshop – rarely going outside the shape tool. To finalize them, I gave them depth, some pattern overlays and shadows/lights. Here are all 6 icons that I used for the cube:

Captain AmericaHawkeyeThorIron ManHulkBlack Widow

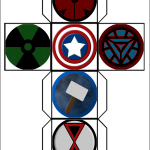
At first, I wanted to print these out on photographic paper and all from the printing press, however, due to price and the fact that making a cube out of photographic paper is a little bit difficult, I decided to go with good old A4. The template that I have used:

Cube template

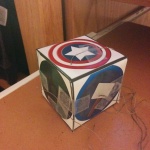
After this, the cube was built, resulting in the below-shown Brobdingnagian monstrosity:

Avengers cube

The conducting strings are attached to more or less the center of each of the squares. Each of them is in turn plugged into the Makey Makey board cables and grounded with one wire, hooked up to my watch. General image of project:

Connections

Come to class for the presentation – to see the digital part! 😀

The jitter in our patches

Over the past two weeks, I have developed a love-hate relationship with max. The love part consists of the visual programming (which is also a hate bit, more about that later). It’s nice to look at the screen and immediately see how everything is connected – in programming, it’s difficult to see everything immediately when one method is about 10 pages down, and you are not sure where it’s called. The not so good bit with visual programming is the lack of code at times. I saw that the jitters are actually JSON syntax files, which was interesting, and, hopefully before the end of the course I will have a go at writing one myself using JavaScript.

In general, Max is fun up until the point that its quirks start showing up. For example, a problem fixed in class today was the && operator – outputs something regardless of result – 0 or 1. That was something new that I did not expect to happen (doesn’t happen in programming, any linked code after a false && will not run).

The first two projects were pretty simple in theory, however, could get complicated if there were many variables to take into account. For example, specifying certain variables to load on start up was an interesting procedure/situation (especially when you don’t write down the 10+ X and Y coordinate pairs for your shapes). Project 1 was a basic animation, you can see it in the link below. The base drums will play when the squares move past certain points (this changes as I experiment, sometimes it hits the edge and will play a sound). The re-sizing tori will cause a crash cymbal to play when the peak point is reached. So, when it stops growing and starts to shrink, the sound will play.

For my second project, I decided to look at something very primitive, my desk mainly (don’t let the image fool you, it is actually way more of a mess). I have my keyboard, memory card, remote, mouse and card reader. The mouse, reader and the ledge are animated, with sounds. Interesting situations happened here as well – mainly with mapping. Window re-sizing tends to mess up the mapping – not sure why this happens, I suppose if the aspect ratio is changed and the padding is on the sides of the image, the program will not calculate the new coordinates based on the image edge, but rather go from the window – so absolute positioning.

Both projects are unlisted on YouTube, but here are the links. Recording quality varied since I used Snagit for one (has some serious glitches on the OS) and Camtasia Recorder for the other one:


Assignment 1:

Assignment 2: