Unfortunately, this will not be narrated by Morgan Freeman – however, I think I am the next best thing. Anywho – big thank you goes out to the ECE department for providing me with a different bread board, the power supply, special pin cables, the TIP31 transistors and a power adapter for the board.
The project was going in the right direction all the time, however, there were many bumps along the way – mainly the power source, as well as my laptop’s and desktop’s inability to detect the board through Max 7 and Windows 8.1 (dammit, Microsoft). I had two bread boards at my disposal, as a result I built two circuits – one with one RGB LED light to test the patch and have a minimal viable product, and the second one with the full strip.
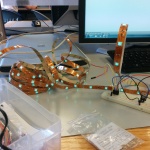
First step consisted of tearing down my LED light strip – good, since I am still going to rearrange the room after this. Second part involved me crawling on all fours to get my power supply for the board (ended up not using this one – did not work – used the one provided by the ECE department).
I built the single LED board and tested the patch – mine and the demo from myWPI. Everything worked. Then, I built the second board, replacing some of the resistors to weaker ones since the power consumption was already enough to keep the lights really dim. I ran over to the ECE department, grabbed what I needed for the power and hooked everything up. Well that did it – LEDs were reacting to sound. Primarily, as seen in the demonstration you had the green light favored over others due to volume and the sound filter. If you look below, you will see the final board images. After that – a video!

