Author: Cameron Back
remainder of project ~80+ total hours
For the remainder of the project, I finished up all of the things I mentioned before. I sewed on the shoulders, siding, and installed zippers along the sides of the suit to make it easier to put it on and off. the final product (shown on figure 5.1)
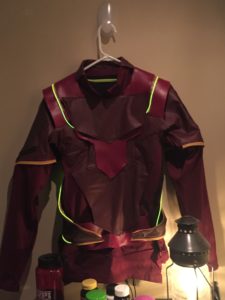
Figure 5.1: final product
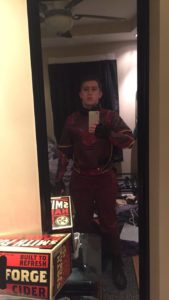
Figure 5.2: lights on
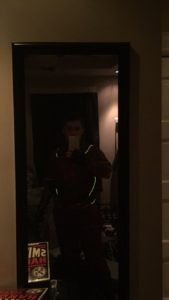
Figure 5.3 lights off
Now that the Flash suit project has been completed, I would like the chance (likely over this summer) to continue such projects in the future. while working on the flash suit, I ran into a few issues, namely in how to put the wire onto the suit in such a way that it looks presentable and nice. namely, I think it would have been far better if I had applied wire tubing instead of just using fabric loops.
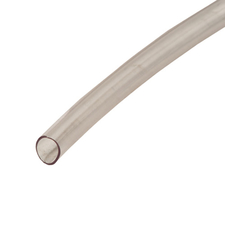
Figure 5.4 clear tubing
The problem with the fabric loops is that they seem to be very out of place when laid upon the leather. if I could fix one thing on the flash suit, that would be it. upon returning home, all I need to do for the flash suit, is to add the lightning bolt on the chest, which I will do using a car emblem (8$) and a circular door stopper I previously owned.
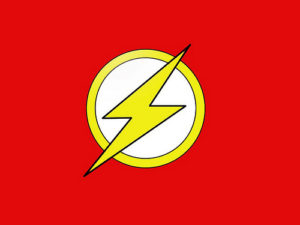

Figure 5.5 flash design Figure 5.6 physical emblem
in future projects over the summer, I would like to work on the Ant Man suit, using leftover fabric. this would also allow me to test out using the wire tubing technique for the suit, and have a better location for the power pack as well.
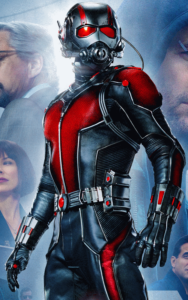

Figure 6.1: ant man mark 1 Figure 6.2: ant man mark 2
Construction_day2,3,4_~20hrs
Hi again, So since the last post, I began working on the pants of the suit, and then moved on to building the sleeves and bracers of the main piece. I ordered and received: new brighter red thick vinyl fabric, and one helmet which will be converted into the flash cowl. I have also nearly completed the concept of the suit as well.

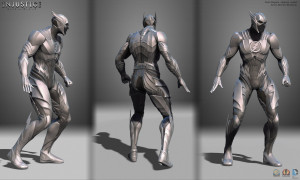
Figure 2.1: helmet Figure 2.2: regime design

Figure 2.3: New helmet inspiration
when making the pants on day 2, I initially tried to make the suit’s pants covered entirely in leather, even sewing it down, but later had to cut out and replace this design with one which left the knees no longer covered. this was a set back, and ended up nearly doubling my total time spent on day 2.
on day 3, I began working on the bracers, as seen bellow, and chose a new design for the suit overall. (as seen bellow). to make this design complete, I also ordered a helmet which will be made into the flash helmet seen bellow with just a few modifications.
the bracers were made using previously made bracers as a model, and utilized the recently acquired thick red fabric. However, the measurements were altered slightly to fit in some new improvements, as well as new aesthetic elements, such as the lightning on the back.

Figure 3.1: bracer construction
For day 4, Wednesday, April 13th, I began work on the sleeves, which were cut out of the jacket, and will eventually be sewn on to an under-piece for shoulder flexibility. the original jacket piece will be a separate vest, which will slide over, giving the appearance of it being one larger suit. I added the padding to one of the sleeves, and sewed it down, then cut the padding for the next sleeve, but ran out of time for that day. the final update on the peice as a whole is shown on figure 4.1

Figure 4.1: day 4 current progress
Construction_day1_12hrs
Construction Day 1
April 2, 2016
Cameron back
in order to acomidate my schedule with other classes, and to minimize appartment messes from the project, I have decided to take one day each weekend to work solely on the Flash EL suit project. the first day of work took place this past weekend, and took a total of 12 hours of work to complete.
I began on by first measuring myself to know my exact torso dimensions all the way around, then I turned the jacket inside out, and pinned the torso to fit these dimensions. I then sewed these gaps shut, and put it back to right side out, and was left with a jacket of the proper torso thickness. nice and tight, like the flash’s suit.

Figure 1.1 fitted jacket
I then moved on to the chest vinyl pieces. much like my previous work in the Green Arrow suit, I began taking pieces of vinyl fabric and cutting it into shapes for decoration of the suit. I went with the original design I revealed in my last post, and was left with an interesting design by the time I was done.
I would first start by measuring the chest of the suit, and determining the dimensions and shape of each piece, then would trace it out on the back of the fabric. I would then trace out tabs on the edges, and cut it out with the tabs sticking out. Then I just had to fold the tabs over, pin them to the back, and sew along the edges to “hem” the sides for a more professional look.


Figure 1.2 heming the sides Figure 1.3 early padding
I started on the chest, then worked on some of the back padding from the initial sketches. I then covered the bottom of the suit, and left room for further improvements by NOT sewing the padding on yet. Instead I will continue pinning each piece on one at time, since this project requires very precise layering of the different padded pieces, and may need design changes mid way through, which will not be possible if they are each sewn on immediately.


Figure 1.4 Day 1 frontal Figure 1.5 Day 2 back
Looking ahead, I would like for the suit to resemble more of the ‘Injustice: Gods Among us’ version of the flash than its original design had, since the design is starting to take physical shape more in that direction. I would also like to be able to cover up the zipper with a button-attachable chest piece, since I do not really like the way it looks with the large gap along the zipper. the following is my newest design plan, and will be the template I plan on using for this upcoming weekend’s work.
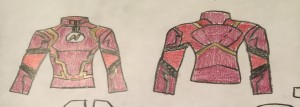
Figure 1.6 Design plan 1

Figure 1.7 Design plan 2
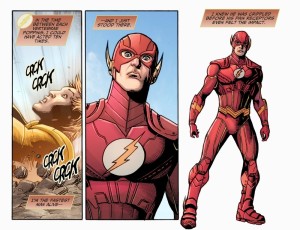
Figure 1.8 Injustice Flash
Cameron Back – Flash concept
For my project, I would like to create a character costume which applies EL wire and related electronics to enhance its design.
for this project to be as cost effective as possible, I preemptively purchased several different vinyl (leather-like) fabrics and materials. All were purchased based on their cost and availability before arriving back on campus for this term. These include:
- 1 yard Dark red vinyl
- 1 yard Deep red vinyl
- 1.5 feet Goldenrod vinyl
- .5 yard Thin yellow lining
- Sound sensitive EL wire pack
- Red base jacket and pants
The total cost is estimated to be: ~= 28 $ fabric + 30$ suit = 58$

So when choosing characters for the costume, I had to make sure the choices would be close enough to the chosen color scheme first. This narrowed down the search significantly. Then, after searching through tons of artwork, and comic book material, I chose to make my costume after the Flash.

Specifically, my plan is to use the EL wire and related sensors, to make the lightning designs around the suit illuminate in reaction to sound and/or speed (as shown above).
Choosing this particular character is a good choice, since in the past, there have been no recorded costumes at comic conventions at this level, other than the flash tv show replicas sold online.
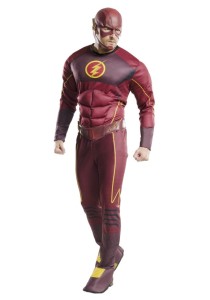
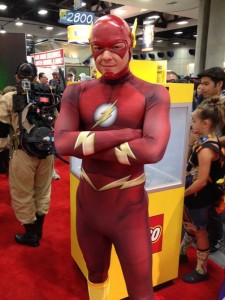
my suit will be of much higher quality than anything seen before, and will be 100% unique in its design. It will also showcase elements from several of the character’s previous designs. having been around since 1940, the flash has seen tons of faces, designs, and incarnations over the past 75 years.
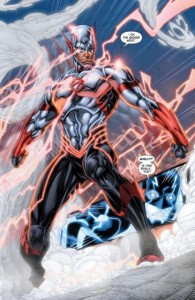
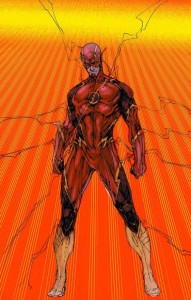
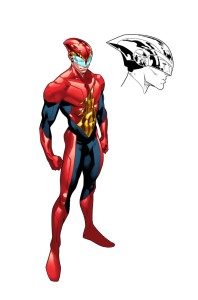

My current design is shown bellow, and pays tribute to several of these designs, while keeping in mind the limits of the EL wire and other hardware needed.

These designs are not final, but I hope to begin work on the suit very soon, and can not wait to show you all more!
Cameron Back – Artist research_StarsDesign
My name is Cameron Back, and for my project I studied costume design projects from both thinkgeek.com and starsdesign group.
For the past two years, stars design grouop has been developing and brainstorming ways to apply EL wire to simple costumes and apparel on behalf of thinkgeek.com
As a design group, their primary purpose is to design clothes to be sold by thinkgeek.com, but what excites me about their work is the spectacular effect these kinds of details can have on a costume or hoodie.
These works were the main reason why I chose to enter this practicum, and have already inspired tons of ideas for my project in this course.
*(change slide)* star lord
Thus far they have overseen two successful profects: the starlord hoodie being their first attempt at applying this design. Much like their previous work, they used more screen printing than light, but in this design, it allows the LEDs to show off the piece without distracting from its main design.
*(change slide)* black widow
Their next project, which I am much more excited about, was the Black widow tee, inspired by the design shown in Avengers 2. In this design, they focused a lot more on the light of the suit, and allowed the Ewire to be the main attraction of the design.
What I particularly like about this design, is that the EL wire allows the design of the suit to form to the human anatomy.
By spreading a strand of EL wire along the joints of the neck and shoulders, it makes a simple tee look far more sleek and impressive than the original design from the movie.
Before I show any more I have to say that none of these following designs or concepts can leave this room, or be posted about on any media site since stars design group has a legal contract with Lucas arts and marvel over many of these designs. therefore, none of these designs may be posted on the project blog or any other internet site.
Short Bio- Cameron Back
Cameron Back
Light Art Humanities Practicum
Biography:
My name is Cameron Back, I am currently studying Electrical and Computer Engineering (ECE). As a college student, I study a lot of electrical systems, and also do a lot of work in: python, C, C++, matlab, CCS, and Vivado. Most recently, I have been working with MSP programmable boards.
I decided to pursue visual art as my humanities requirement because despite my main focus being engineering, the field of art has always been incredibly interesting to me.
My interest in visual art is mostly inspired by my love of movies, cartoons, comics, and other similar pop culture. Most of my work has been influenced by comic book superheroes, such as the Avengers, the Justice League, and Watchmen. These stories continue to thrill me even today, and most of my best works of art are in reference to characters from these stories.
In fact, I spent most of my early years of middle and high school learning to draw things from these types of stories, and slowly began to learn more about perspective, lighting, and the human anatomy. In high school, I learned how to use In-Design as a 2D digital art software, and from there, began to pursue other methods of digital Art in College remembering that experience. These include: Maya, Zbrush, and Flash Animation.
However, the type of art that excites me the most is costume design and fashion. Because WPI is a very project based program, I decided to take on a project the summer before attending. I did this to prove to myself that I could see it all the way through to perfection. During that summer, my friend and I attended Comic Conn in St. Louis, and were blown away by costumes people wore there. Each one had incredible amounts of detail and style to them, and I wanted to take on a project like that for myself. I chose to create a Green Arrow inspired suit for myself that summer. I spent several hours every day working on both the design of the suit, and on the actual construction of the suit.
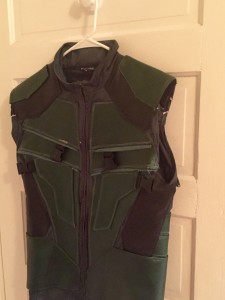
By the end, I had something to be proud of, and the confidence to pursue future projects at WPI.
But despite the project being over, I still think quite a lot about different possible costumes and Ideas, and would love the opportunity to work on this type of project again.
