Light Art Practicum at Worcester Polytechnic Institute
I experimented with more colors and found that the best is a rainbow effect, which I arranged in a sort of heat map fashion of red, orange, yellow, green then blue. I overlapped the paper in the back to hopefully blend the colors and create smoother transitions.
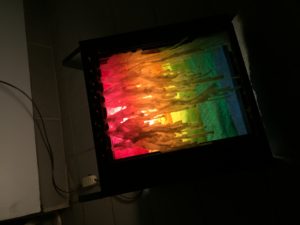
Then I decided to add more wax and will show off the final product in tomorrows class.
Week of April the 4th
I started working on my light art practicum in which i was dripping wax onto a sheet of glass. I started off dripping plain wax onto the glass at different heights to see how it would effect the wax. I found out that the lower the angle to more round the dots where were as the higher the angle the more deformed and splash like they were. I found that the higher angle was the way to go.
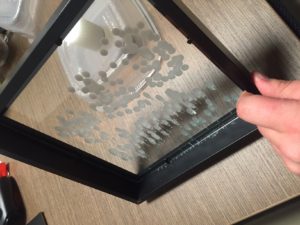
After I was done testing the angle effects I decided to add some color wax to make it more interesting and to start covering the whole frame with wax. during the process I turned the frame, held it at different angles and let some wax drip into the same spot to create flows.
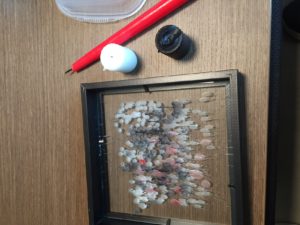
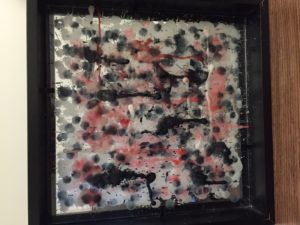
This is the final result that I got. The next decision I had to make was how to light it and I originally wanted to back light it with other candles. After I got some larger candles to light it from behind I found they didn’t provide enough light to light the wax. So I ended up using a flashlight to light it from behind and from the front and here are the results of it.
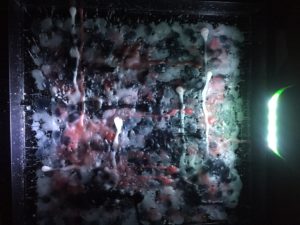
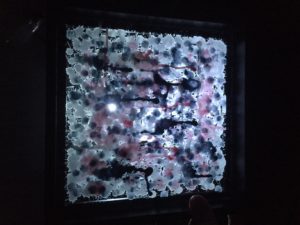
I was not happy with the results because it just didn’t look as cool as i imagined when i first started this process. Also there was a lack of detail, by this I mean there was lack of detail in the multiple layers of wax which I wanted to see. There was one positive that came out of this. I really did like the flows of wax they were the most interesting this about this first attempt. So now i needed to build a structure to hold the glass and candles in a constant position.
Week of April the 11th
I started building the box to hold the glass. I got some nails and cut plywood and tape to hold everything together.
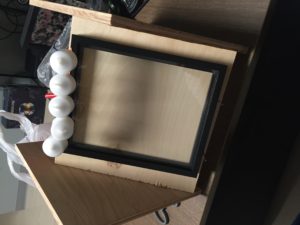

I ended up taping some nails to the top of the frame in order to stick candles on so they cold drip wax in a constant position. I do plan on making it more stable when I have access to power tools when I go home this weekend.
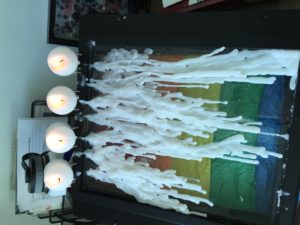
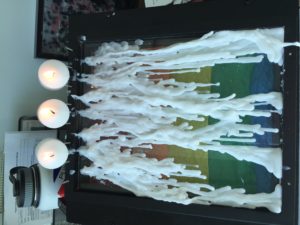
Then I started the process of lighting the candles and making sure that there was a constant stream of wax dripping onto the glass. This meant I had to scrap wax off of the candles to provide a path for the melted wax. Also every couple of minuets I blew the candles out in order to let the wax solidify and for new flow paths to be made. This is what I ended up with.
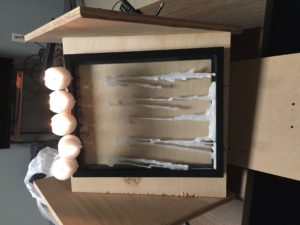
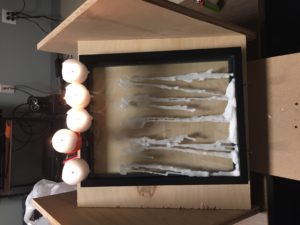
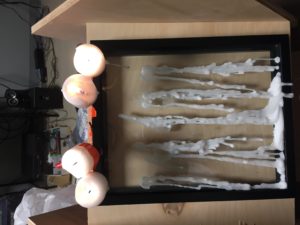
I was very pleased with the results of this, but I still needed a light source to illuminate the wax because a flashlight was just a temporary solution. Also A major improvement that needs to be made is a whole in the wood behind the frame to allow light through.
Week of April the 16th
I finished improving the box in which the frame will sit on and spray painted it black. I also found a suitable light source because it is an already defused LED light bulb, then I wired all the components together.
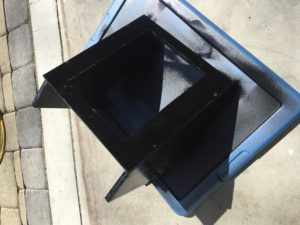
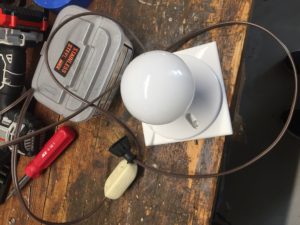
I ended up drilling holes into the top of the frame to put nails through that would hold the candles. Then I put nails in the box that would go through the bottom of the frame that would hold it in place.
Then I dripped more wax onto the frame, which I cleared of the old wax. Everything worked amazing and it fit all together and it held the candles perfectly. This is the result.
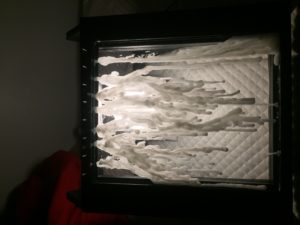
It turned out amazing and the light provided enough light to really illuminate the details in each layer of wax. Then I planned to continue to drip more wax onto the glass and I needed a diffusing material behind to add more focus onto the wax. While I was doing this my roommates mentioned how it looked like a very relaxing experience so I decided that I should make this an interactive experience for anyone to enjoy. So during the next class meeting I would see if anyone wanted to come and interact with it.
Week of April the 25th
The people that did interact with my Interactive wax said the same things my roommates said, which is that it is a very relaxing experience and I would agree because throughout the process I was never stressed and looked forward to working on it. I also really enjoy how the sculpture changes over time with more wax added and wax falling off because part become brittle.
I finally got some diffusing material (tissue wrapping paper) to light the sculpture and this is what I got.
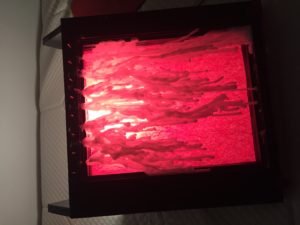
This is defiantly better than what I imagined when I first started the project so I am very pleased with how this came out. I plan to do different colors and mix colors and add more wax.
This video was made as a demo to show off a new Phillips 4k tv, but uses light art to make it an even more stunning video than the normal demo videos. Enjoy!
Jen Lewin: Interactive Sculptor
Tools and Techniques
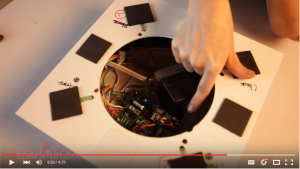
In the construction of her pieces she uses a lot of small microcontrollers, custom electronics, Arduinos, LED lights and different types of sensors. Along with her skills in mechanical engineering, electrical engineering and computer science. She is able to get the sculptures to react to specific stimuli in a way that she wants and she is able to build everything in house.
Inspiration
She was inspired by where she grew up in Maui, by this one spot where she could see the clouds and sunset and how the light changed and evolved in particular she liked how the light and clouds moved. Most of her work is to fabricate large-scale interactive sculptures that combine light, sound and motion to encourage community interaction. She thinks beyond the traditional art exhibition by focusing on sculptures made for public use in order to create an experience that brings vibrancy to neighborhoods, parks and public spaces. The high amount of interaction with the pieces essentially makes the visitors the artist because based off of everything they can transform the piece to become anything they want.

Art
The Pool
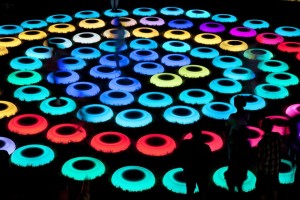
Her most known work, The Pool, which spans almost a quarter acre and consists of over 200 LED interactive, glowing, outdoor platforms. When stood upon, they interact with each other, change colors and emit sound according to pressure and speed changes brought upon by the viewers who are interacting with this exhibit. The idea came from a camping trip to Australia where they found a bunch of tidal pools lit up by the moonlight and they jumped around from tidal pool to tidal pool and she wanted to recreate that experience with these “pools of light”. It is constructed with plastic and there is no centralized computer instead it has small computers (Arduino’s) in each base, which run a couple basic rules that then propagate through the system. The sensors can tell users weight distribution, which in turn makes the lights react a certain way based of the rules programmed into the system.
The Moths
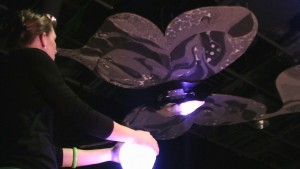
3 large silken robotic moths that flap their wings when there are people touching the controllers. The controllers are these glowing orbs that measure capacitance and when people place their hands on it the capacitance changes and the sensors pick this up and wirelessly transmit a signal to the moths to start moving and have the lights on their bodies start slowly strobing, which gives the whole exhibit a very ethereal feel.
Edison Clouds
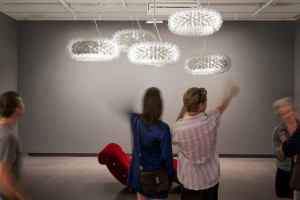
It is constructed with 1,200 LED’s that are placed inside old incandescent bulbs. The sculpture reacts to people moving in the space by sensing their motion with some sort of camera and creates a crude image or shadow effect on the clouds. The Edison cloud also has a standard cloud pattern the plays on it when you lie in the chair, which was inspired by Jen when she was a child and used to watch clouds in Maui.
My experience with art making includes 7 years of photography and basic art intro classes in college and highschool. Also I know how to use photoshop, Maya, 3DS Max and Zbrush. My experience with tech is very limited I don’t know how to code, but I have done ECE 2010 so I know basic circuits. With Tech I usually buy completed products that say react to music instead of building it my self, but I do know how to strip wires and solder. I don’t do any other creative activities other than art. My inspirations usually are light related with photography I like to be able to show motion with a still image and that is why i usually do long exposures of lighted objects because not only are the conditions ideal for that sort of photography but i also love the way they come out. I also try to incorporate important family stories, traditions and objects into some of my drawing or painting. Another inspiration of mine is science so using different scientific concepts or phenomenon to create a picture or even shooting some interesting phenomenon by themselves. My artistic goals are to create cool pictures; stuff that wow’s the viewer. I like to make art that people will ask me how I did it. Above are some pictures I have taken that have to do with light. Then I have to screenshots from my Instagram because I couldn’t find the originals, but I made a Deadmau5 helmet and a chandelier made with coke cans. and the link below “Light reactive leds” is a video of what I did to my room last year.